Review by David Saffir, instructor with SCV Center for Photography
Not too long ago I wrote a review of the Mamyia AFDIII and the Leaf 22MP back. At the time, I felt it was an excellent camera, and I still do.
In this report, I’ll cover my recent experience with another Mamiya camera and digital back: the Mamiya DF body, and the Mamiya DM56 digital back. Since space is limited on the blog, I’ll hit the high points as I see them.
Bottom line: a greatly improved, highly flexible camera body that, coupled with this digital back, delivers superb image quality. I have a few nitpicking suggestions, but overall this camera is impressive.
Dan Cuny, of Mamiya/Mac Group, came to the SCV Center for Photography in Santa Clarita and provided camera gear for us to use. We started the day with a live demo for a number of photographers from the local area, shooting still life.
The camera feels robust and well made. The viewfinder is big and bright, and the in-viewfinder indicators are easily read. We used two lenses: the 80mm f/2.8 lens supplied with the camera, and a manual-focus 120mm macro lens. The camera is very well balanced with either lens mounted. I’ve found that I can work all day without suffering undue fatigue.
The camera can be used with focal-plane, or leaf shutter lenses. Highest sync speeds are reported up to 1/1600. The DF camera body is compatible with existing 645AFD lenses.
The camera was equipped with a Mamiya DM56 digital back. This back provides excellent resolution, 12 stops of dynamic range, and true 16-bit capture. Color rendered by this back is terrific – vibrant, very accurate, and totally clean.
The large, bright screen on the back makes it easy to view images and manage the controls – although performance in direct sunlight could still be improved.
Autofocus feels appreciably faster than previous camera bodies, and reports from others who have tried this camera confirm this.
We set up a Calumet shooting table, and several monolights. We started out with high-key lighting, but switched later on to a more dramatic approach. The shooting table is ideal for this work, providing a smooth, clean translucent plexi surface that allows totally flexible light placement.
We shot with the camera tethered to a Mac Book Pro, using the provided 14-foot long Firewire 800 cable. Leaf Capture 11.3 was used to manage capture and image processing.
The Indian bowl we photographed (a personal possession of mine) was initially shot using high-key lighting, with the camera mounted on a tripod. We used a Sekonic hand-held meter to measure exposure, and a PocketWizard Plus to trigger lighting from the camera.
Note the clean contrast lines in the bowl:
And here’s a version with more directional lighting:
Note how clean the shadows are; virtually no luminance or color noise. We were using ISO 100, one step (albeit a relatively small one) above base ISO of 80.
I was quite surprised by this; conventional wisdom concerning high pixel density is that shadow noise will be significant – but not in this case. I used virtually no noise reduction in the images shown in this article – although I can’t say for sure that there isn’t some processing going on in the guts of the digital back. Regardless, performance exceeded expectations.
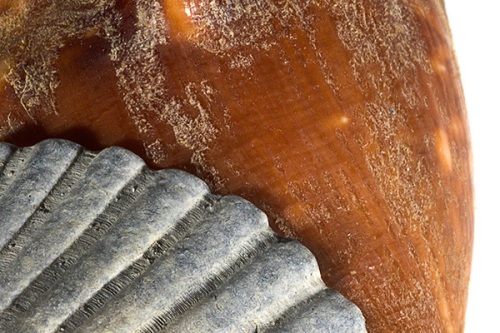
We also shot a still life of some sea shells. Note the rendering of subtle colors, and in the second image, the sharpness and detail. Impressive.
Later in the testing, I had the opportunity to photograph a model in a studio setting. I often use low-key, dramatic lighting in my personal work. The lighting setup was created by a friend, Ron Brewer – I tweaked it a bit, and this is the result:
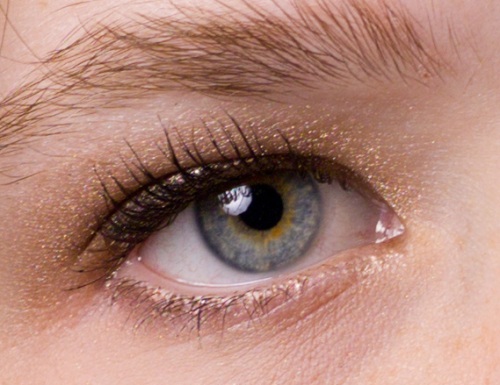
The highlight/shadow transitions are clean, and free of noise. Also note the high level of detail around the eye (below). These images are not retouched, other than a basic levels/curves adjustment.
The nitpicks? The thing that bugs me the most is the location of the Auto exposure lock button – it is placed toward the outer side of the camera grip – and I found myself having to adjust my hold on the camera to reach it.
The digital back viewscreen, like just about every one out there, is very difficult to see in bright light outdoors, much less direct sun. It is, however, great in other circumstances. Don’t know if this is a solvable problem; at least Hasselblad provides an LCD view of the histogram on top of the camera grip.
And last, battery life, as with all MF digital cameras I’ve used, is less than I’d like. I realize the battery has to power the guts of the back, and the preview screen, but I’m still blasting through several batteries a day outdoors. If Nikon and Canon can make batteries that go a full day, why can’t the MF manufacturers?
Last but not least:
Say what you will about performance of high-end DSLRs, there’s still a noticeable difference between 14-bit capture and medium format 16-bit capture, in color fidelity and accuracy – and as good as DSLR lenses are now, it’s still true that MF lenses are hard to beat.
The flexibility of the camera is very good – given the sync speed, choice of shutters/lenses, software (Phase One or Leaf), and ergonomics. Whether you shoot weddings, studio, fashion, or landscapes, it’s worth a look. I haven’t shown them in this article, but the images I took on location are just as good as those provided here. (by the way, outside temps were over 100F one day!)
And a parting thought: this latest Mamiya incarnation has a new feeling of sophistication and polish that comes through
every time I pick it up. It’s a shooter’s camera.
——————————————————
Disclosure: I did not receive any compensation from Mamiya or Mac group in exchange for writing this article.


